

Next up on the crafty list is a holiday banner. Do you have one yet? This one was quick (and free) to make, and you can even get the kids involved. You can use any materials, but I chose to use burlap and a red wool blazer that I threw in the washing machine to felt up. Use whatever fabric you have lying around the house. Use funky patterns or mis-matched colors. This would be a great, green way to repurpose some ugly holiday sweaters.
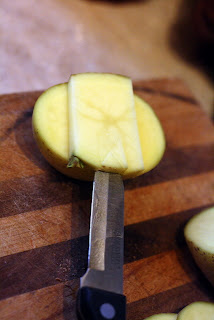
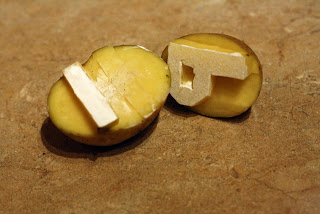
You'll basically need fabric for the circles, fabric for the banner strip, yarn, paint, and potatoes. Yup, I said potatoes.

I cut the blazer into smallish circles (I traced around some ramekins from my kitchen to make a perfect circle, but I did it in 2 different days and used 2 different sizes by mistake. I preferred the way it turned out though, with the different-sized circles).
I also used 2 different blazers, and one was thicker than the other. For the circles made from the thinner fabric, I sewed them together with yarn and a big needle. Then I laid out the circles in the order I wanted them.


Now you're going to attach the circles to the background. Sew a length of yarn through the top of the circle, attach it to the background strip (it helps to have a big needle to do this), and tie the yarn off.

I had my circles dangle at different levels. That's it! I hammered it right into the wall with some nails. The banner says it all!

Check out some of the other 12 Days of Green Christmas Crafts:
December 14: Felt Owl Ornaments  | December 15: Burlap Ruffled Tree Skirt  | December 16: Easy Advent Calendars  |
December 17: Quick Gift Tags from Kids' Artwork  |
No comments:
Post a Comment